Overview
Scheduling jobs in Web applications is a challenge, and we can choose from many job scheduling frameworks.
-
Hangfire: an open-source framework that helps us to create, process and manage background jobs
-
Quartz.NET: a full-featured, open source job scheduling system that can be used from smallest apps to large scale enterprise systems.
-
FluentScheduler: a .NET library to create automated job scheduler with fluent interface
-
Telerik .NET Scheduler: a ASP.NET library to schedule jobs of data source component, Web service, WCF service, and OData.
-
and more
Hangfire Introduction
Hangfire is an open source job scheduling framework to schedule fire-and-forget, recurring tasks in Web applications sans the need of a Windows Service. It takes advantage of the request processing pipeline of ASP.Net for processing and executing jobs.
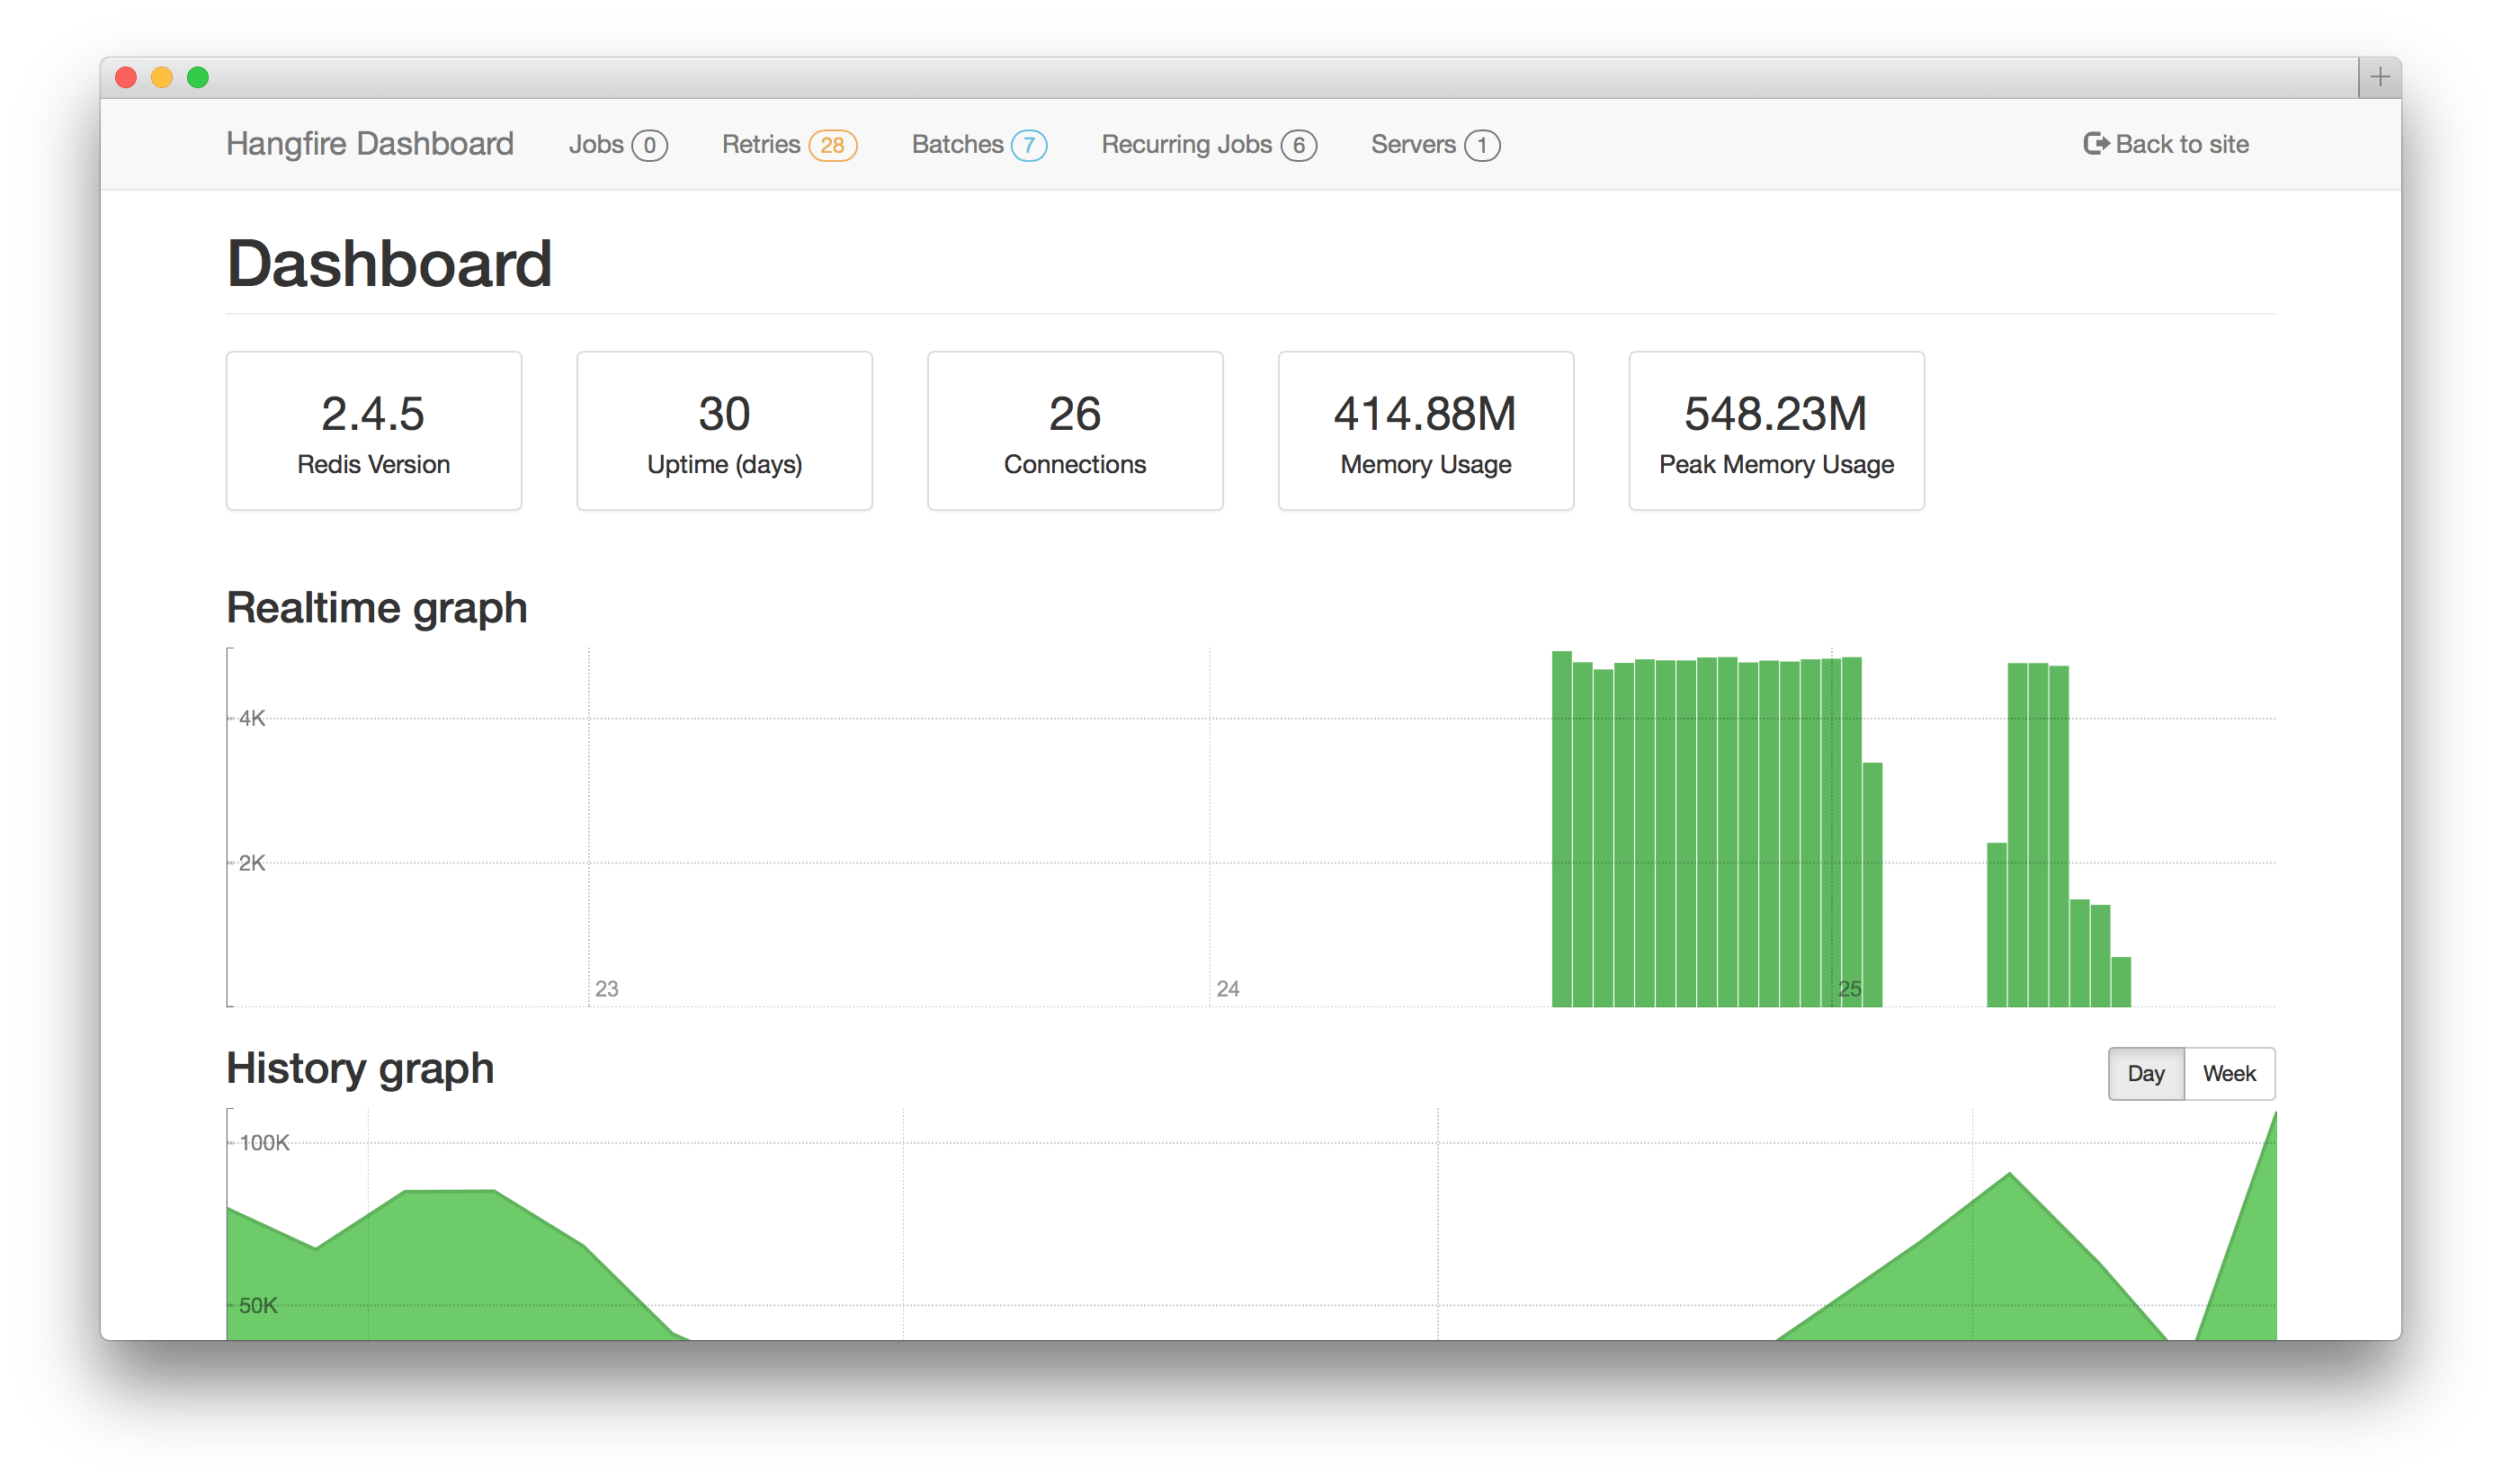
Hangfire is not limited to Web applications; we can also use it in your Console applications. The documentation for Hangfire is very detailed and well structured, and the best feature is its built-in dashboard. The Hangfire dashboard shows detailed information on jobs, queues, status of jobs, and so on.
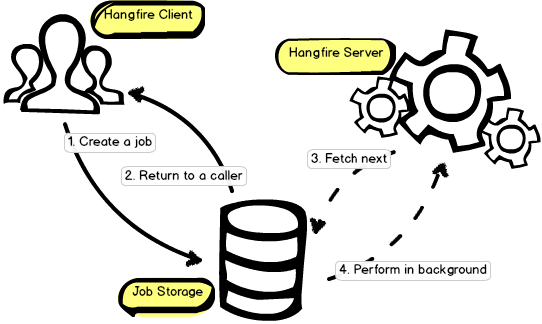
Hangfire architecture
There are three major components in Hangfire: client, storage and server.
- Client create jobs and drop to storage
- Storage saves jobs and execution results. By default, Hangfire job storage supports SQL Server Storage and MemoryStorage. Please note that all waiting jobs will disappear if our server restart using MemoryStorage. Database storage is preferred.
- Server pick up jobs from storage and execute in background
.net 4.5 Installation
-
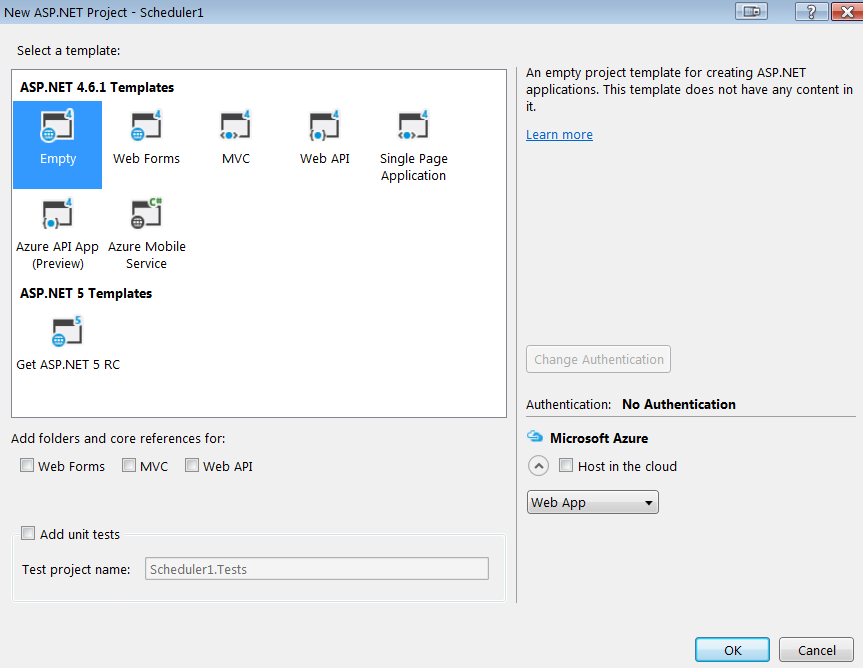
Create a web project: Scheduler
-
Install Hangfire package Hangfire is published as NuGet packages. Please right-click on your project > choose Add Library Package Reference> search Hangfire > Install Hangfire
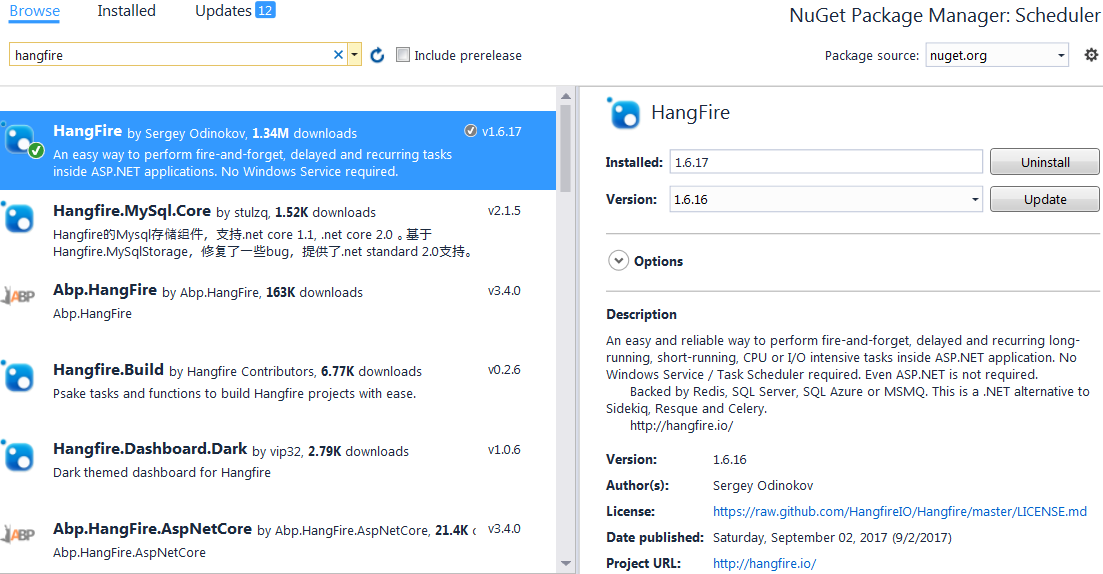
below packages will be installed:
- Hangfire
- Hangfire.Core
- Hangfire.SqlServer
- Microsoft.Owin
- Microsoft.Owin.Host.SystemWeb
- Newtonsoft.Json
- Owin
Please note that Hangfire depends on Microsoft.Owin.Host.SystemWeb therefore OWIN is installed as well.
-
Add Owin Startup class
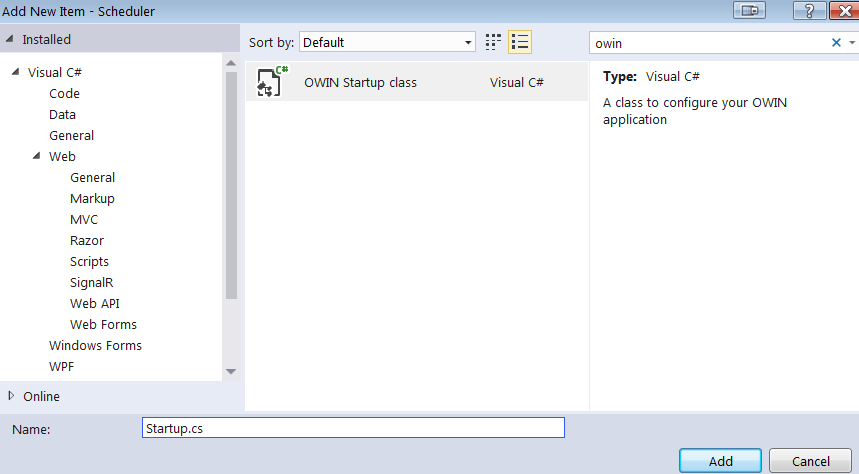
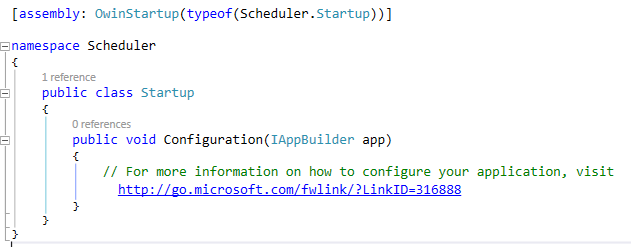
Add Hangfire configuration in Startup.cs
 using Microsoft.Owin;
 using Owin;
 using Hangfire;

 [assembly: OwinStartup(typeof(Scheduler.Startup))]
 namespace Scheduler
 {
     public class Startup
     {
         public void Configuration(IAppBuilder app)
         {
             // For more information on how to configure your application, visit http://go.microsoft.com/fwlink/?LinkID=316888
             // way1, use database as storage
             GlobalConfiguration.Configuration
                 .UseSqlServerStorage("SchedulerContext");
             // way2, use MemoryStorage as storage
             //GlobalConfiguration.Configuration.UseMemoryStorage();
             app.UseHangfireDashboard();
             app.UseHangfireServer();
         }
     }
 }
Please note that here we use database as storage and therefore we have to install entity framework and add connection string in web.config.

-
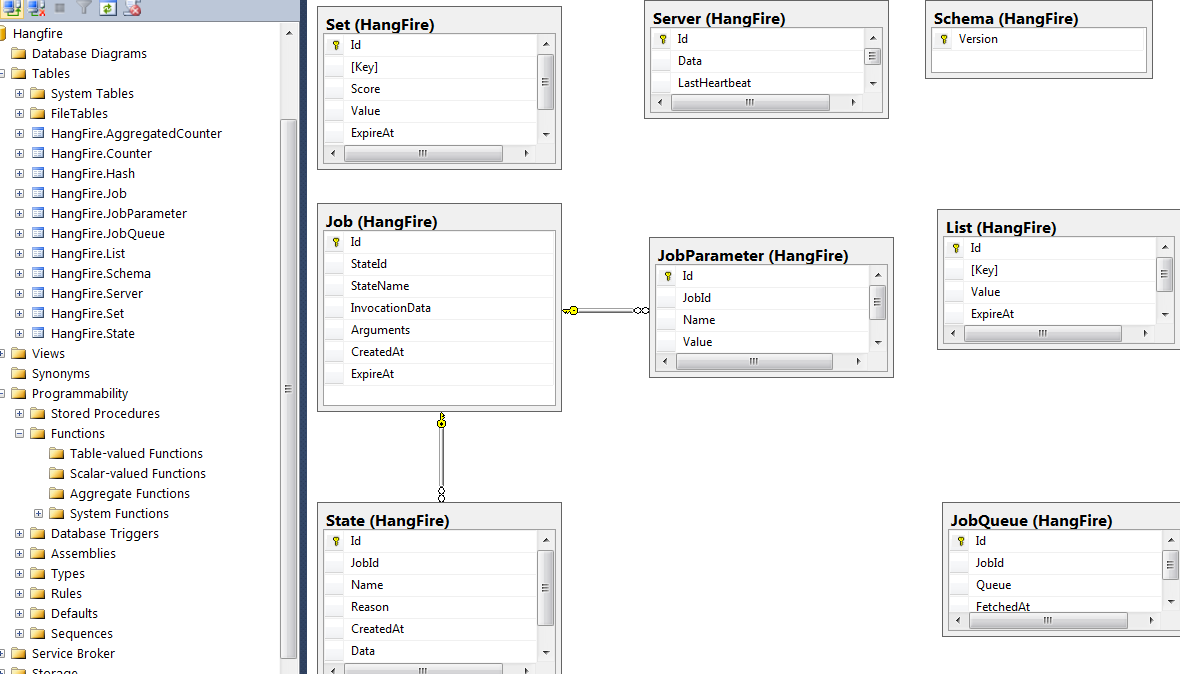
Start the project. Please note that when Hangfire starts, it will automatically create and populate relevant tables/stored procedures for us.
navigate to http://hostname:port/hangfire to view dashboard
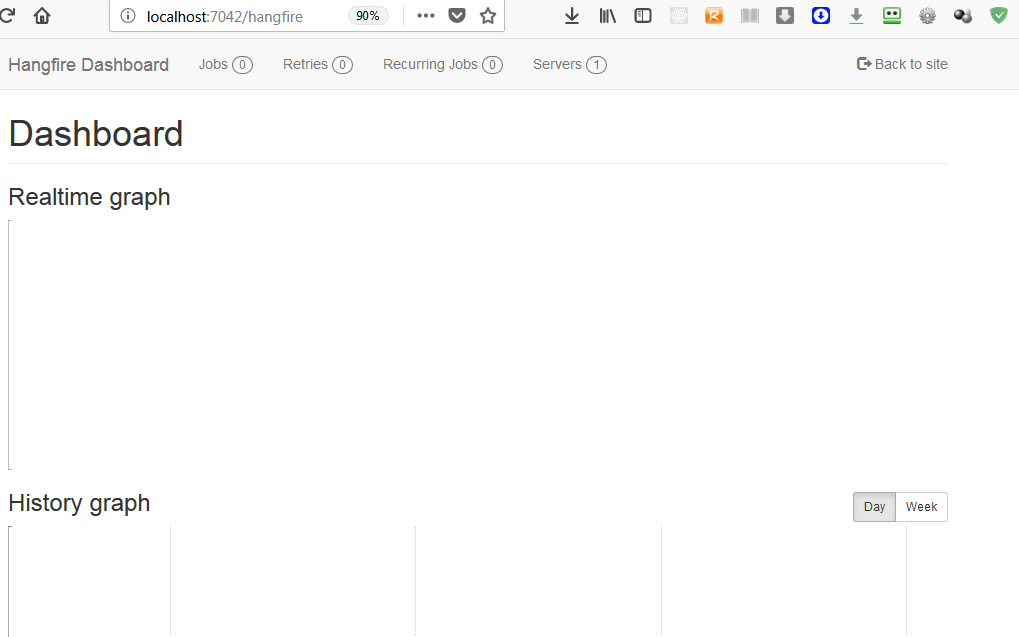
Please note that we have one server running and ready for running jobs.
.net core 2.1 Installation
-
Create a web project: Scheduler
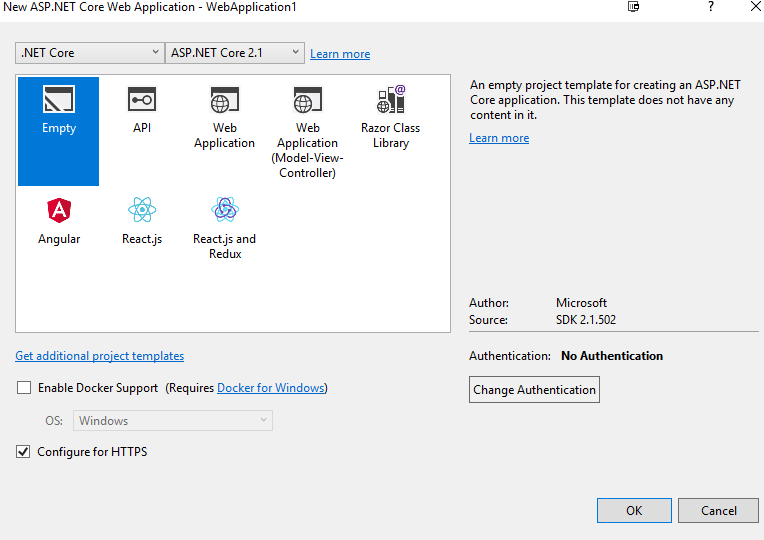
-
Install nuget package
HangfireHangfire.CoreHangfire.SqlServerHangfire.AspNetCore -
modify
Startup.csnamespace Scheduler { public class Startup { public void ConfigureServices(IServiceCollection services) { services.AddHangfire(x => x.UseSqlServerStorage( "Data Source=servername; Initial Catalog=Scheduler; MultipleActiveResultSets=True; User Id=username; Password=password")); } public void Configure(IApplicationBuilder app, IHostingEnvironment env) { if (env.IsDevelopment()) { app.UseDeveloperExceptionPage(); } app.UseHangfireServer(); app.UseHangfireDashboard(); // add ui app.Run(async (context) => { await context.Response.WriteAsync("Hello World!"); }); } } }or
`appsettings.json` { "ConnectionStrings": { "HangfireConnection": "Data Source=(local); Initial Catalog=HangfireTest; MultipleActiveResultSets=True; Integrated Security=true;" }, "Logging": { "LogLevel": { "Default": "Warning", "Hangfire": "Information" } } } public void ConfigureServices(IServiceCollection services) { // Add Hangfire services. services.AddHangfire(configuration => configuration .SetDataCompatibilityLevel(CompatibilityLevel.Version_170) .UseSimpleAssemblyNameTypeSerializer() .UseRecommendedSerializerSettings() .UseSqlServerStorage(Configuration.GetConnectionString("HangfireConnection"), new SqlServerStorageOptions { })); ... -
create a database:
CREATE DATABASE Scheduler -
Start the project.
dotnet runPlease note that when Hangfire starts, it will automatically create and populate relevant tables/stored procedures for us.

navigate to http://hostname:port/hangfire to view dashboard

Hangfire
-
Create a web project
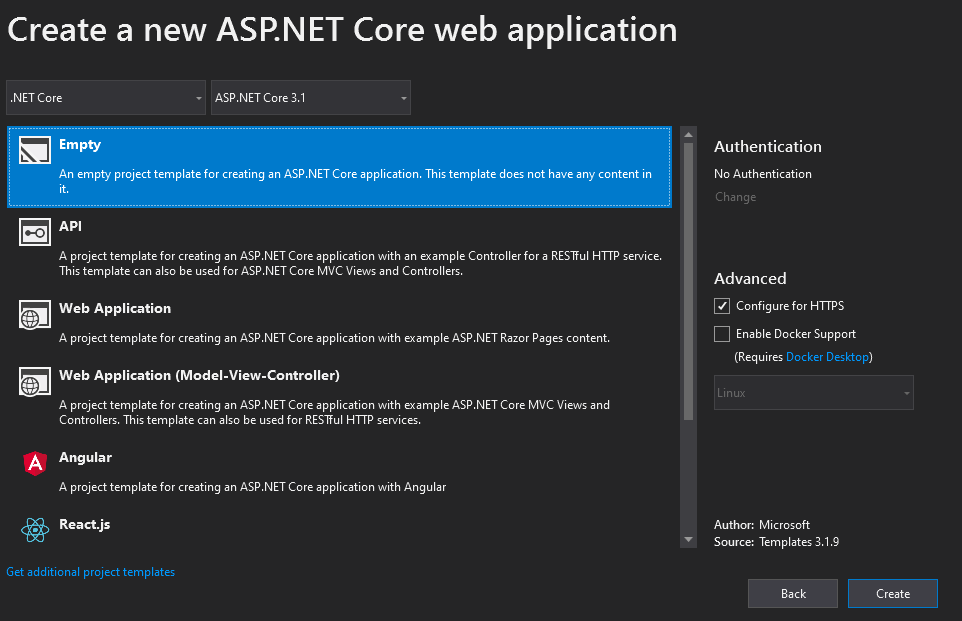
-
Install nuget package
 Hangfire.Core
 Hangfire.SqlServer
 Hangfire.AspNetCore
 Microsoft.EntityFrameworkCore.SqlServer (optional)
-
create a database:
CREATE DATABASE [HangfireTest] GO -
Configuring Settings
appsettings.json
{ "ConnectionStrings": { "HangfireConnection": "Server=(local);Database=HangfireTest;Integrated Security=SSPI;" }, "Logging": { "LogLevel": { "Default": "Warning", "Hangfire": "Information" } } } -
Register services
Startup.cs
// … using Microsoft.Extensions.DependencyInjection; using Hangfire; using Hangfire.SqlServer;
namespace Hangfire { public class Startup { public Startup(IConfiguration configuration) { Configuration = configuration; }
    public IConfiguration Configuration { get; }

    public void ConfigureServices(IServiceCollection services)
    {
        // Add Hangfire services.
        string hangfireConnectionString = ConfigurationExtensions.GetConnectionString(this.Configuration, "HangfireConnection");
        services.AddHangfire(configuration => configuration
            .SetDataCompatibilityLevel(CompatibilityLevel.Version_170)
            .UseSimpleAssemblyNameTypeSerializer()
            .UseRecommendedSerializerSettings()
            .UseSqlServerStorage(hangfireConnectionString, new SqlServerStorageOptions
            {
                CommandBatchMaxTimeout = TimeSpan.FromMinutes(5),
                SlidingInvisibilityTimeout = TimeSpan.FromMinutes(5),
                QueuePollInterval = TimeSpan.Zero,
                UseRecommendedIsolationLevel = true,
                DisableGlobalLocks = true
            }));

        // Add the processing server as IHostedService
        services.AddHangfireServer();

        // Add framework services.
        services.AddMvc();
    }

    // This method gets called by the runtime. Use this method to configure the HTTP request pipeline.
    public void Configure(IApplicationBuilder app, IWebHostEnvironment env, IBackgroundJobClient backgroundJobs, StockContext stockContext)
    {
        ...
        app.UseStaticFiles();

        app.UseHangfireDashboard();
        backgroundJobs.Enqueue(() => Console.WriteLine("Hello world from Hangfire!"));

        app.UseEndpoints(endpoints =>
        {
            endpoints.MapControllers();
            endpoints.MapHangfireDashboard();
            endpoints.MapGet("/", async context =>
            {
                await context.Response.WriteAsync("Hello World!");
            });
        });
        //
    }
} }
-
ctrl+f5 to run or
dotnet runto run
Create a simple job
Now we are ready to create long running tasks and drop them to Hangfire as jobs. These tasks should be independent without interacting any external resources.
Typically, they are void methods and encapsulate contextual details such as database access, 3rd api calls. Also, it should only accept primitive data types or serializable objects as inputs. Here is an example.
public class TaskRunner {
	public void Run(int requestId, string employeeNo){
		// new db context, access database, make processing, save data...
	}
}

In this case, we can drop Run() method of an instance as a job to Hangfire.
Here, let’s create our first job.
-
Convert this web project to a mvc/webapi project, add a HomeController. Add a Test() method and a TaskRunner class
 [RoutePrefix("")]
 public class HomeController : Controller
 {
     [Route("test")]
     [HttpPost]
     public ActionResult TestHangfire()
     {
         new TaskRunner().Run();
         return Content("ok");
     }
 }

 public class TaskRunner
 {
     public void Run()
     {
         // new db context, access database, make processing, save data...
         Thread.Sleep(20000); // simulate some long running work
         File.WriteAllBytes("c:/delete/hangfire/test.txt", Encoding.UTF8.GetBytes("I am some result"));
     }
 }
Please note:
- we can call the endpoint via:
POST http://hostname:port/test - we sleep the thread on purpose to simulate a long running work
- we can call the endpoint via:
-
Next, we use BankgroundJob of Hangfire to create a simple fire and forget background job. It only run once.
using Hangfire; [RoutePrefix("")] public class HomeController : Controller { [Route("test")] [HttpPost] public ActionResult TestHangfire() { // turn the call into a fire and forget background job. BackgroundJob.Enqueue(() => new Scheduler.Controllers.TaskRunner().Run()); return Content("ok"); } } -
POST a request to
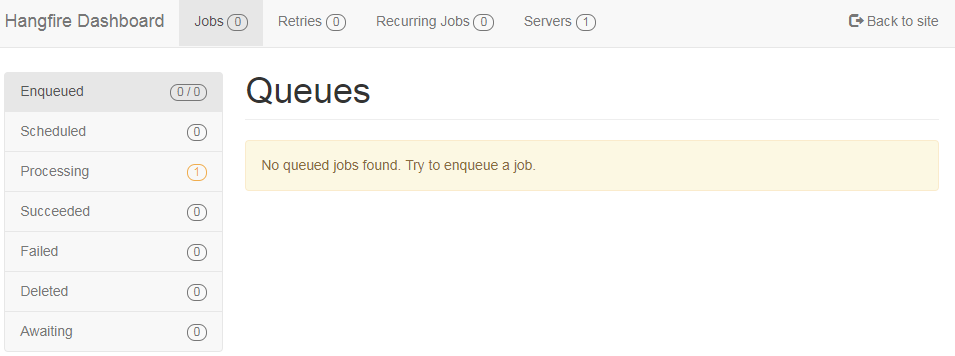
http://hostname:port/test, then we immediately open the Hangfire dashboard athttp://hostname:port/hangfirewe will see a job is in processing
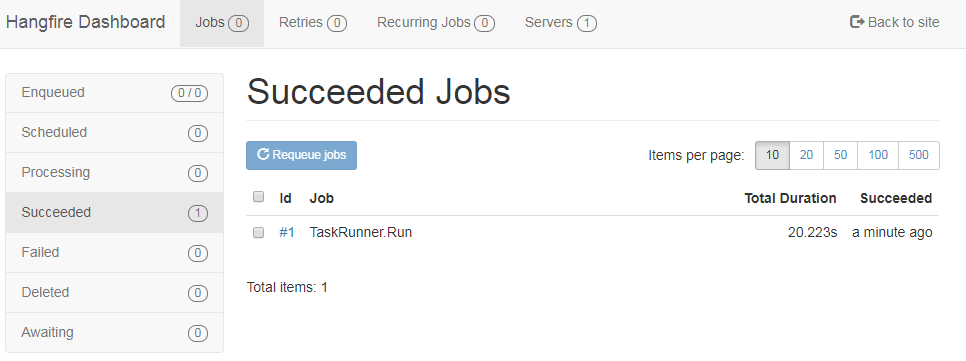
After 20 seconds, the job is done
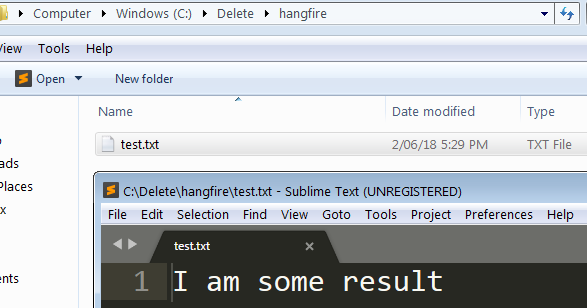
Also, we will get the result after the job is done:
Next
- more job types
- dashboard
- performance optimization